

Total Blast
Well, the 2017 Solar eclipse has come and gone and all in all it was an amazing experience! This was my first total solar eclipse after seeing a few partial ones through the years from Cincinnati. The most recent one I saw there was a 93% eclipse which you would think would makes daylight quite dark but I learned that day that the difference between a total eclipse and a partial is like, well, night and day!
The Setup
I had been hearing about this eclipse for over a year, and spent a good solid couple months preparing for it. Since this might be one of the few total eclipses I'll see in my lifetime (although I am looking forward to 2024) I wanted to make sure that I got some good photos. The hard part about that is that these things are notoriously difficult to photograph and you only really have one shot at it. Since this was my first I didn't want the task of photographing it to detract from just experiencing it without getting bogged down in the details of equipment and all of that, so I wanted to make the photography as automated as possible.
I eventually decided to use four cameras to capture the event; two still cameras and two video cameras. The main camera was my astronomical CCD camera which looks through the telescope and then it Is controlled by a computer which actually takes the pictures and stores them on the hard drive. In advance of the event I had to do a number of test sessions with this set up to determine the proper exposure and how to get the telescope mount to track the Sun when you can't see any stars in the sky to a align to the north star. As it turned out the image from this camera combined with the telescope I was using did not allow the entire sun to fit into the frame which was unfortunate but the solution to fix it was really expensive so I decided to make the best of it.
The second camera was a mirrorless DSLR which was also attached to the telescope mount so it would track the sun across the sky. The main job of this camera was intended to take wide-angle shots of the Sun during the totally eclipsed phase of the event. My initial testing determined that the lens came with this camera did not zoom far enough in to get a good high resolution shot of the Sun and the corona so about a week before the event I ordered a new, longer lens that gave an acceptably large image although hindsight being what it is I wish it could've zoomed in a little more.
The third camera was one of those little GoPro video cameras which I decided to stick high up in the air with its wide-angle lens seeing both of us on the ground and looking northwest where the Moon's shadow was going to be coming from. In doing reading about the past eclipses I have heard that in the seconds prior to being engulfed in totality you can actually see the moon's shadow rushing at you if you have the right vantage point. The perfect scenario for this would be being on the top of a mountain with a valley below you in the direction of the approaching shadow. It is said you can see a diffuse dark shaft rushing at you at a speed of 1500 mph!
My chosen location didn't include a mountain but I thought I might be able to see something if I pointed a camera that direction which turned out to be a good decision.
The fourth camera was almost an afterthought but after re-reading an excellent article on photographing solar eclipses in Sky & Telescope magazine I decided to take one of my video cameras, fashion a temporary solar filter for it, and roll video not so much for the pictures but for the sound! I didn't know how many people were going to be around at that time but it is said that the sound of a bunch of people watching a total eclipse is electrifying and since this was easy I thought "Why not?"
Location Location Location
One of the first things I had to decide was where to see it from. It was only going to be a 98% eclipse where I live so I knew I would have to travel at least a little bit to get on the centerline of the moon’s shadow path across the United States. I know from living in Hilton Head that the weather along the coast is highly variable and difficult to predict so I thought a more inland location would be better.
There were a number of highly accurate, high resolution maps of the path of the Moon's shadow posted on the internet so I studied these and selected a spot right on the centerline just south of Columbia South Carolina in an outlying town called Gaston. The eclipse maps could only get you in so close so I called up Google maps on my web browser, noted some landmarks that were directly on the centerline on the eclipse map and then zoomed in farther on Google maps and using the street view function was able to cruise around the neighborhood looking for a suitable place with no obscuring trees closeby, easy access etc.
My primary place was a small one-story church called Shiloh United Methodist Church which when I tried to contact them I discovered that their phone had been disconnected so I assumed they wouldn't be having any big eclipse carnival that day. One bullet dodged…

It was a good two and a half hour drive to Columbia and I was planning on taking the back roads up since I couldn't absolutely count on I-26 being clear all the way since the shadow path followed it fairly closely and could be choked with traffic. I had a lot of gear to set up so getting delayed in traffic was simply not an option. I took one small wrong turn on the way and for the first time in my life I actually had to avoid a rooster on the road! Guess he had to get to the other side…
Gear Down
I arrived about 11:15am which left me plenty of time before the beginning of the eclipse at 1:15pm. The first thing I set up was the GoPro camera because I wanted to make a time-lapse video of the setup process. Next was the telescope mount and scope, do a quick polar alignment by using an iPhone and a sky map app, and then attaching the still and video cameras.
The astronomical CCD camera was hooked up to the telescope and although I know it was total overkill, I programmed it to take a picture every second for the entire 3 hours of the event. I was thinking that I could sequence them together and make a movie of the roughly 4000 still images that would show the Sun getting gradually covered up by the Moon, become totally eclipsed, and then have the Moon recede getting everything back to normal. Fortunately there were a couple of nice sunspot groups on the Sun that day.

The Moon just starting to cover up the Sun
The Moon would take about 1 hr 15 minutes to completely cover the Sun and once I was assured that everything was running smoothly I did what any sane person would do, I had lunch! This was thoughtfully provided by my neighbors back in Bluffton who decided to come along a bit later for the show. During this time we had at least two people stop by wondering if we had any eclipse glasses for sale. Talk about last minute shopping! My neighbors Sam and his wife Shannon and Kelly from the front desk at Grande Ocean (where I do Sky Guy on Tuesdays) and her boyfriend were fun to hang out with and I explained a few things about what we could potentially see as we got within a couple minutes of totality.

The Eclipse Crew

A versatile accessories case is a must!
I was surprised that given this ideal location that there weren't more people showing up but I guess if you're lucky enough to have a total solar eclipse show up over your house some day you don't really need to drive to the other side of town to make it last 2.5 seconds longer.

My rig for the day. Notice that even the cameras that weren't running had solar filters on them.


I had my computer set up in the back of the car taking that picture every second of the eclipse's progress but the image on the screen made for a handy way to monitor the progress of things without having to crane your neck although I thought the view through the eclipse glasses was very cool.
In the Still of the Day
As we got within five minutes or so I started the video camera and took some test shots with the still camera which I discovered during my previous testing could be controlled from an app on my phone! This was great because I wouldn't have to worry about my finger pressing the shutter button and causing the whole mount to shake a little causing blurring or misalignment of images.
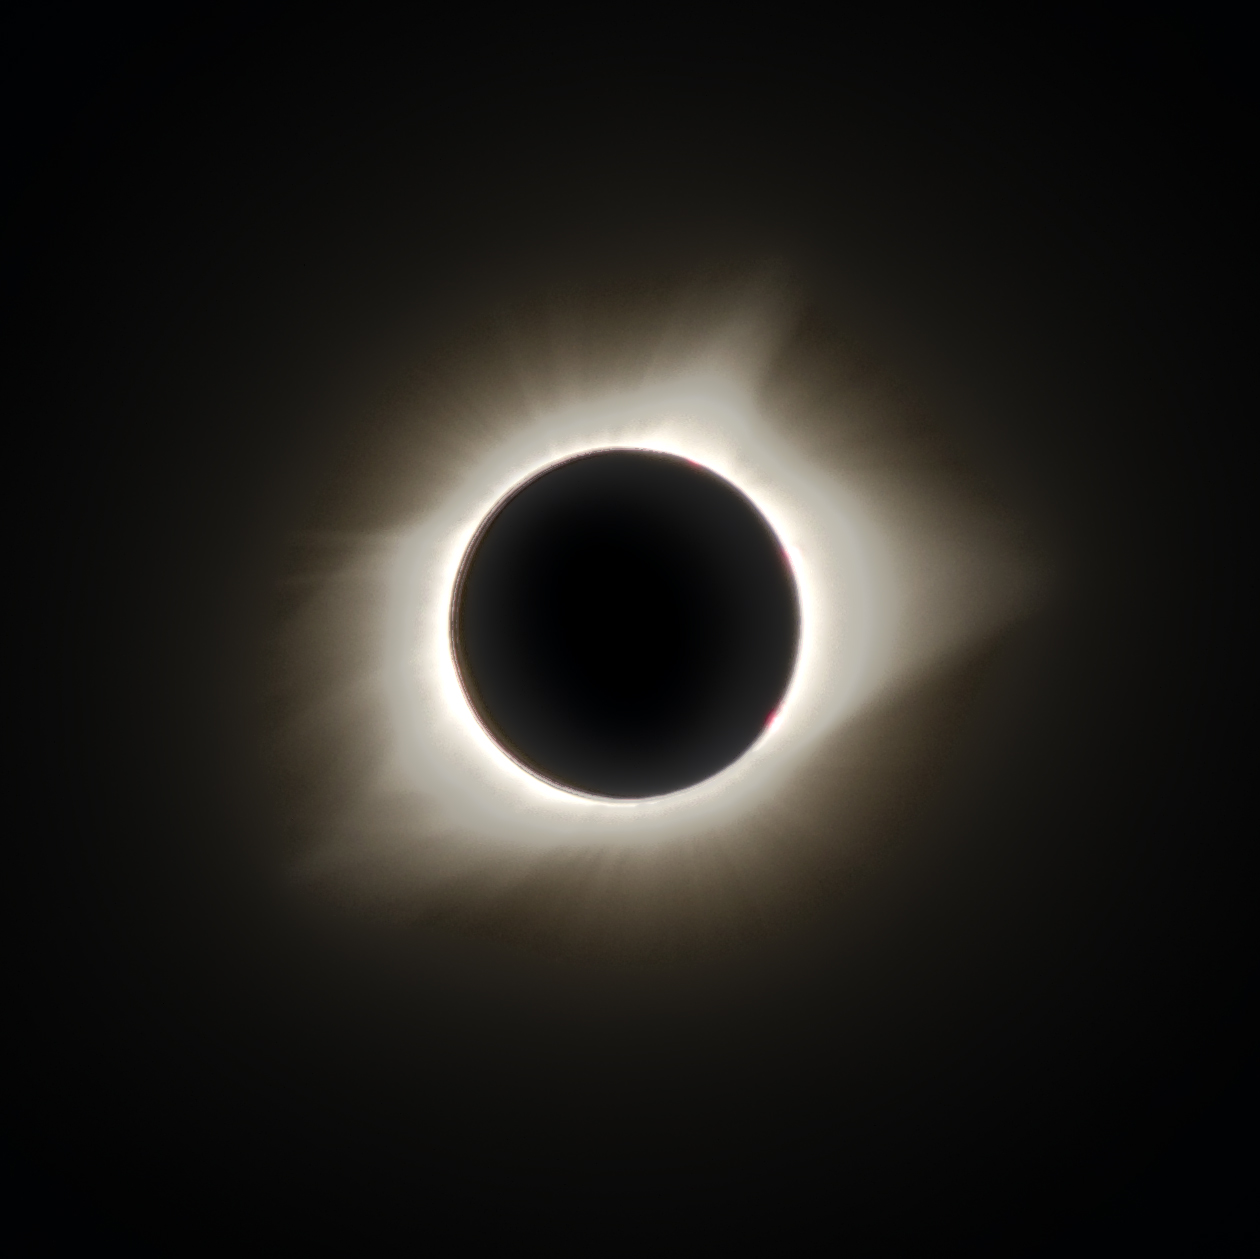
The still camera was the one I was really hoping to get the best photos of the total eclipse from. I had it set on a bracketed exposure setting which means that it takes 3 shots at progressively darker exposure settings, one at the center, and 3 gradually brighter images for a total of seven pictures at seven different f-stops–one of them had to be right! During the total phase of the eclipse I pressed the shutter button on the app as fast as it would allow and took over 400 images in two and a half minutes. I also planned to be able to use a number of images from each seven image sequence in a layered photo using the best parts of each in what is known as HDR (High Dynamic Range) photography. This all worked amazingly well as the image below shows.

This image was taken about halfway through totality
I re-centered the image from the CCD camera on the telescope since it had a tendency to drift and needed a touch up every 5 minutes or so and double checked the GoPro to make sure it was still running in video mode; it had inexplicably stopped recording on it's own earlier in the day so I wasn't going to blindly trust it. Confident that my tech situation was as good as it was gonna be we started getting set for the main event.
I was pretty sure I wasn't going to be able to visually see the moon's shadow rushing at us because of the church and a tree in the way so I trusted that if it could be seen the GoPro would get it.
Main Event
The light was really starting to look strange now. We were down to about 30 seconds before the onset of totality and there was just the tiniest of sliver of sun showing now.

You would think that with 99.x% of the Sun covered up it would be damn near dark and while it was obvious that the sun's light was drastically diminished it still had that quality of "weak daylight" or how strong the sunlight might be on a more distant planet like Mars.
This was the time to look for what are called "shadow bands" which is a scintillation of the Sun's light very much like the way stars twinkle, except this was projected on the ground; the thin beam of light is easily buffeted by the Earth's atmosphere causing this shimmering effect seen on the ground all around you. I didn't find them all that obvious but the other people in the group said they saw them; I might have been distracted with everything that was going on in my head!

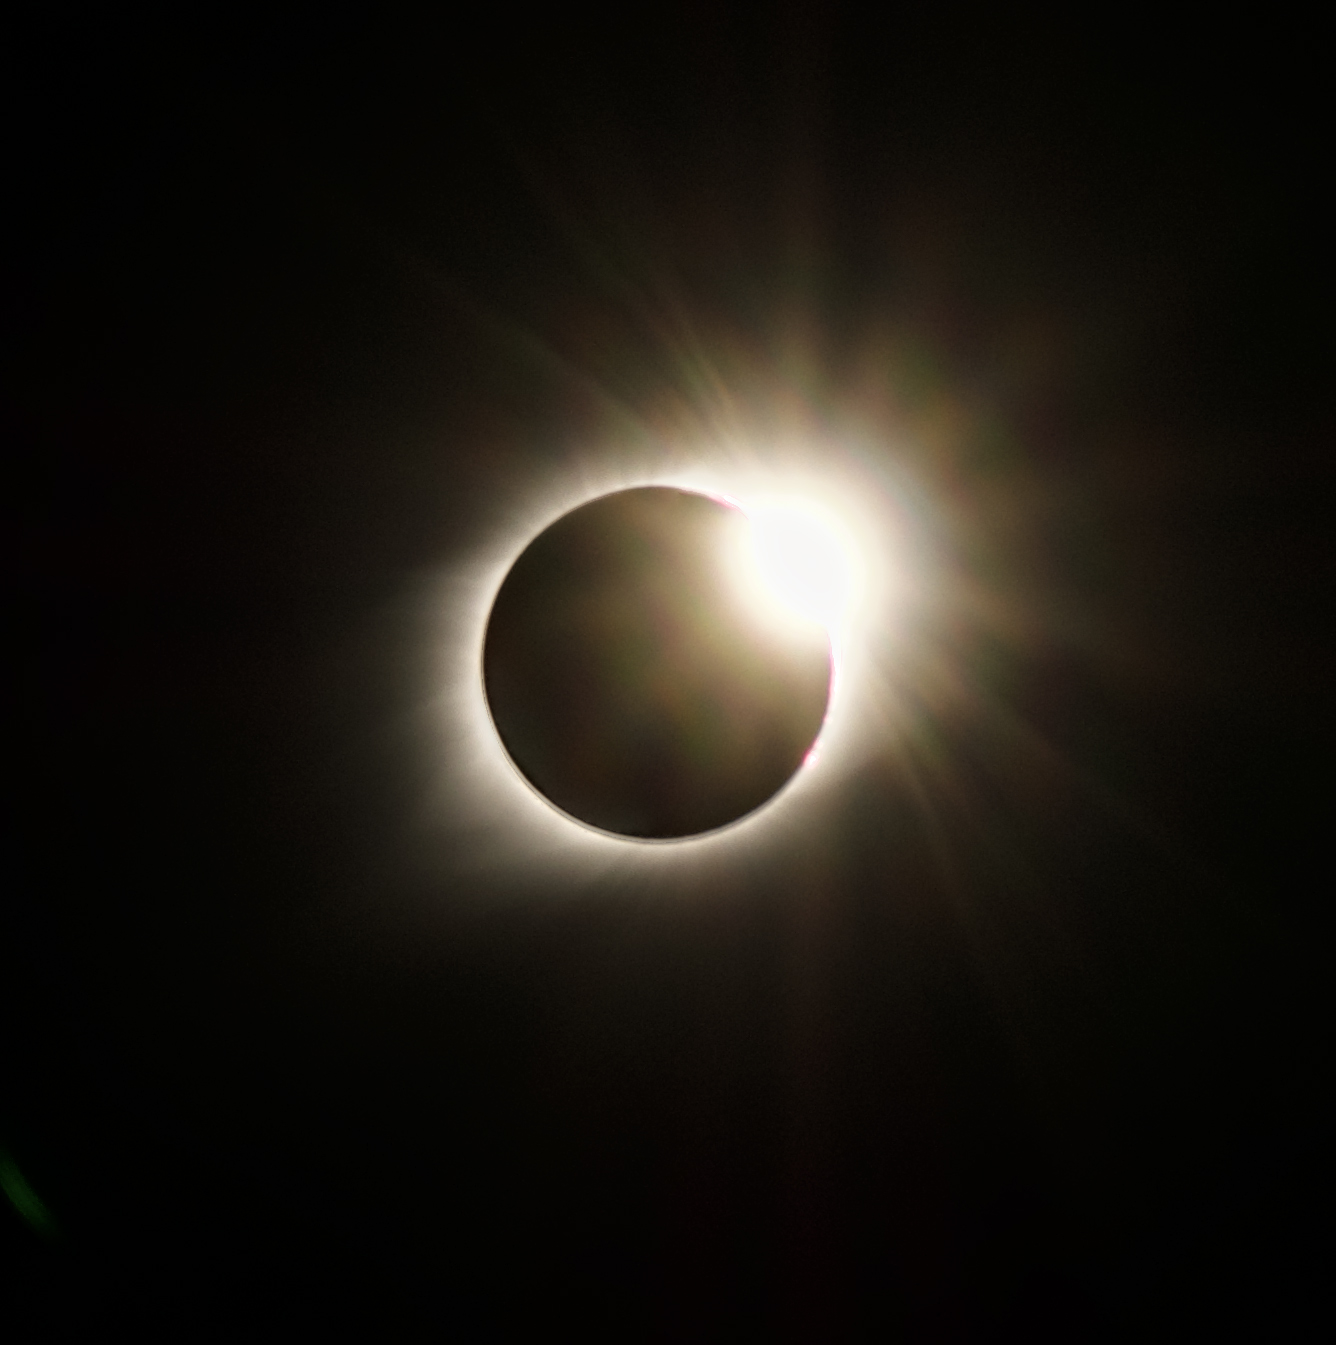
The last gasp of the Sun's light to go before totality leaves just one little spot of the photosphere showing creating what's known as the "diamond ring". The still camera got a number of good shots of this. This only lasts about 15 seconds getting weaker and weaker until just like that, you are enveloped in darkness. It's not the same kind of dark that you get at night because there is still quite a bit of diffuse light coming from the corona (the Sun's outer atmosphere) but it's definitely not light. The street lights came on, birds starting chirping (they were probably thinking, "Wait, seems like I just got up!") and there was an audible gasp from everybody watching.
Totality was supposed to last two minutes and thirty five seconds at my location and from the onset of the diamond ring I started firing the shutter of the still camera, each push of the remote shutter button on the app taking seven images. Later I found out I took over 450 images in that 2.5 minutes. Once the diamond ring was done the eclipse glasses came off and you could experience this in it's true naked eye glory.
There's a lot to notice during an eclipse and a finite amount of time so I had my checklist running in my head. There were four planets in the sky, Jupiter off to the West which was far enough away that it was still a viable evening object just after sunset, and Venus, even farther away to the East making it a brilliant object (bright as a low plane) in the sky just before dawn. These were super easy to spot and now I can say I've seen Venus and Jupiter during daytime!
In theory you had both Mercury and Mars on either side of the Sun but they were supposed to be much dimmer and pretty close to the Sun and I didn't easily detect them and decided not to really waste any precious "totality time" on them. The bright star Regulus (in Leo) was right next to the Sun and while I couldn't see it visually it does show up on some of the photos.
Words are inadequate so I won't even try, but suffice it to say that a total solar eclipse is a truly unique natural spectacle on the grandest of scales. Here are a number of photos from the totality:
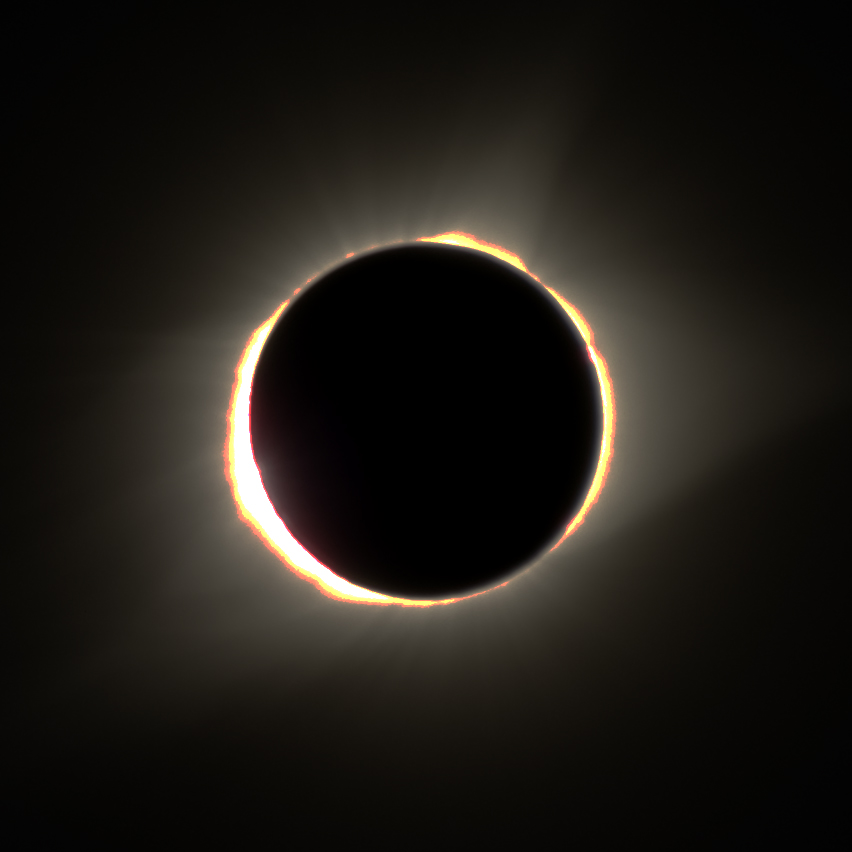
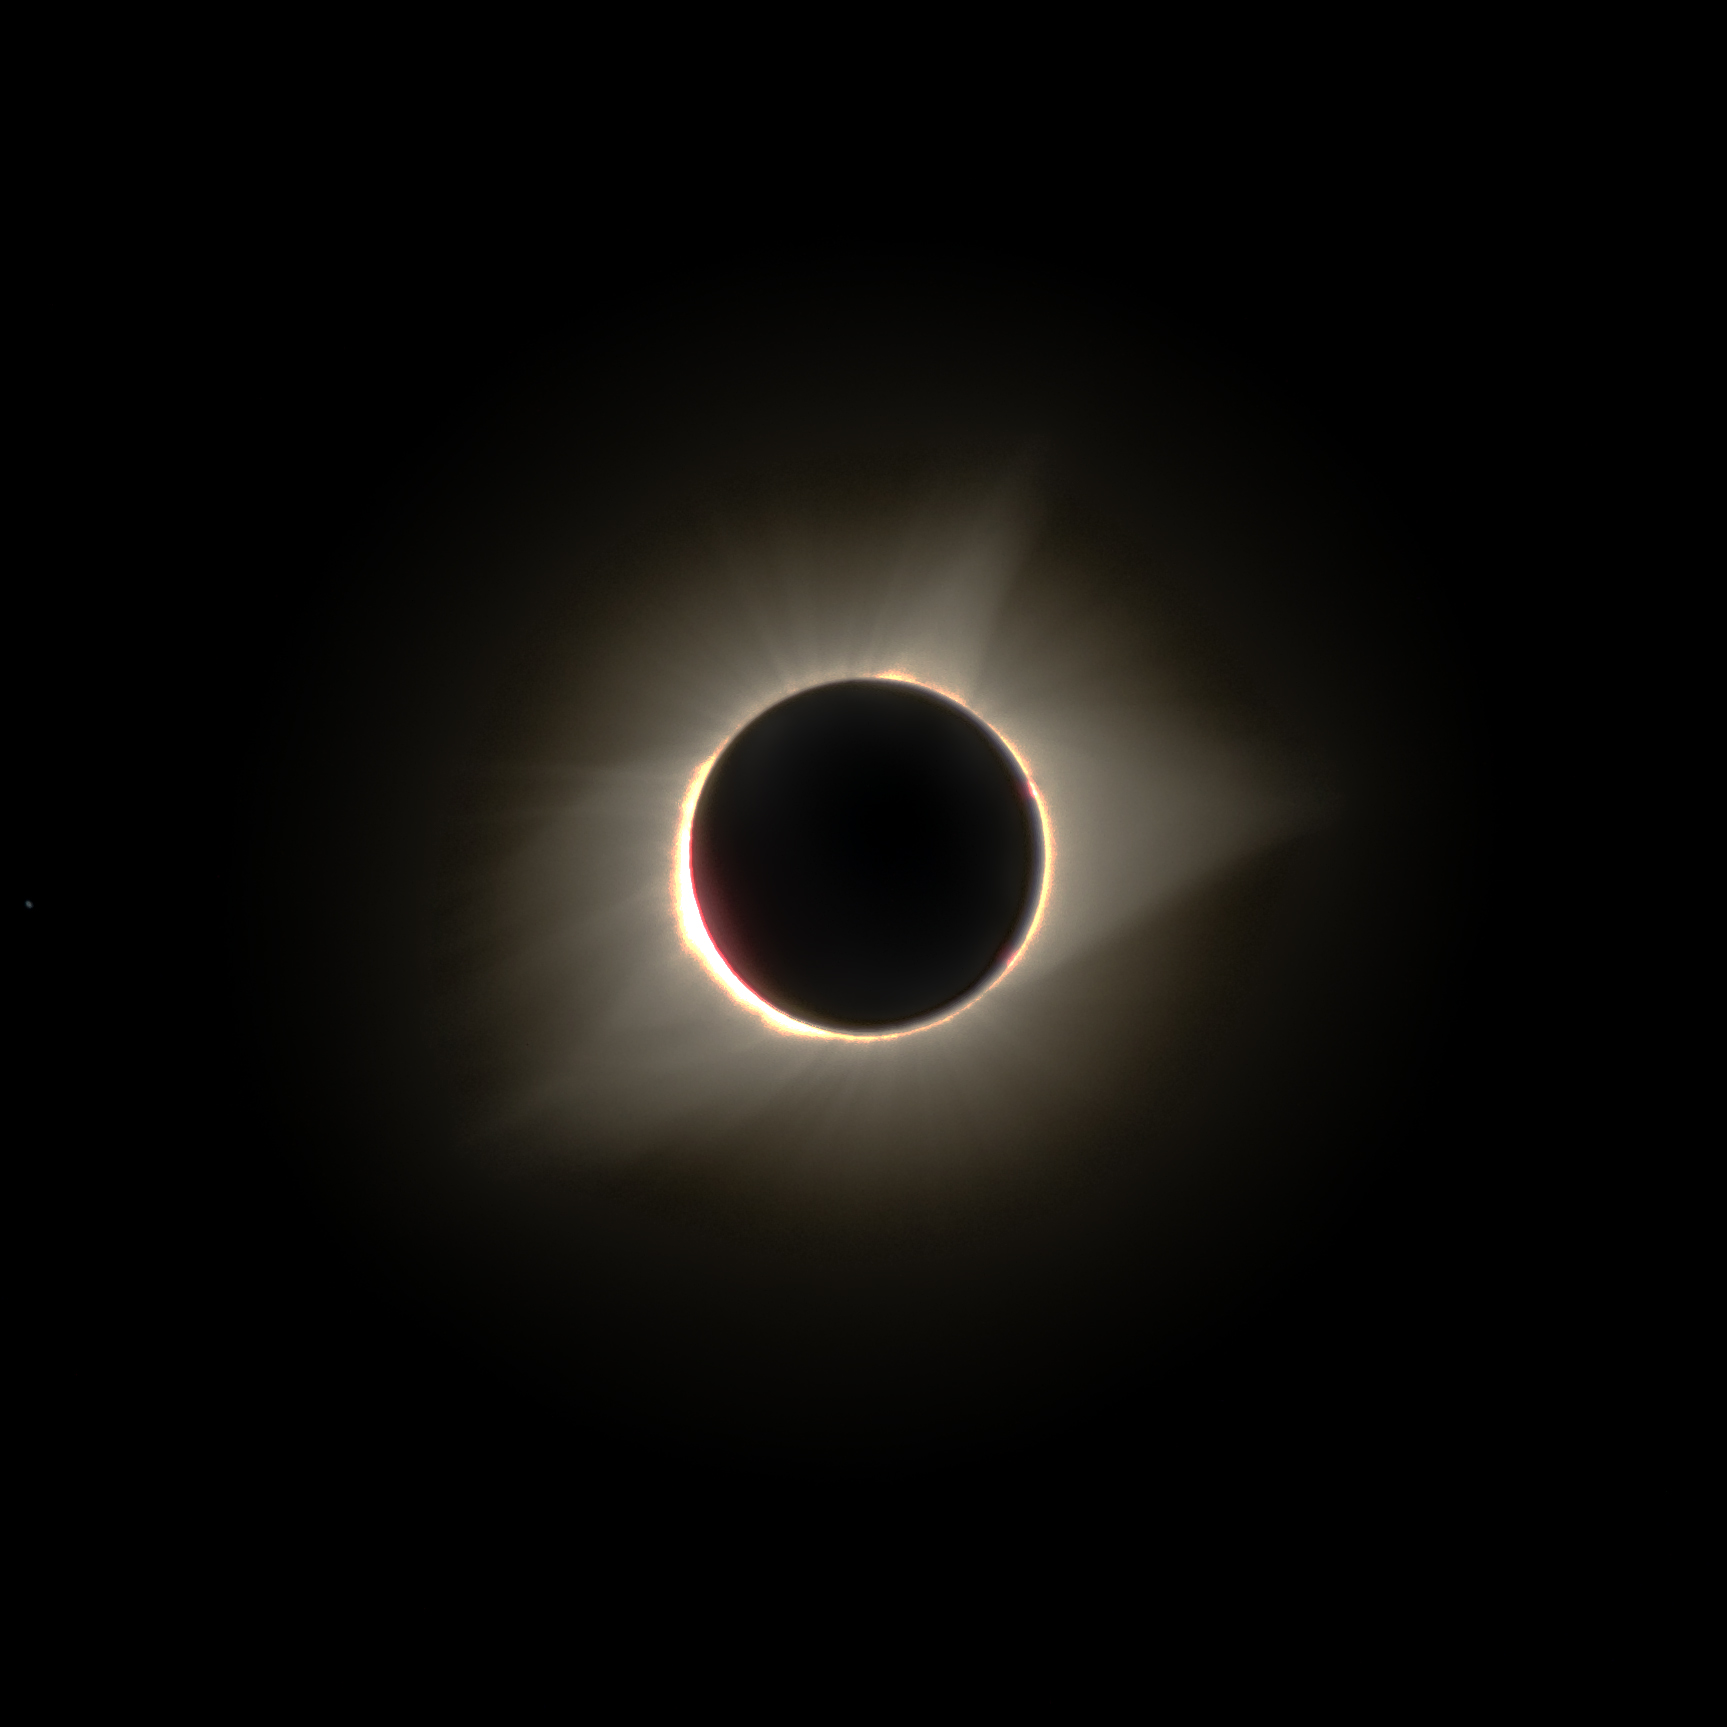
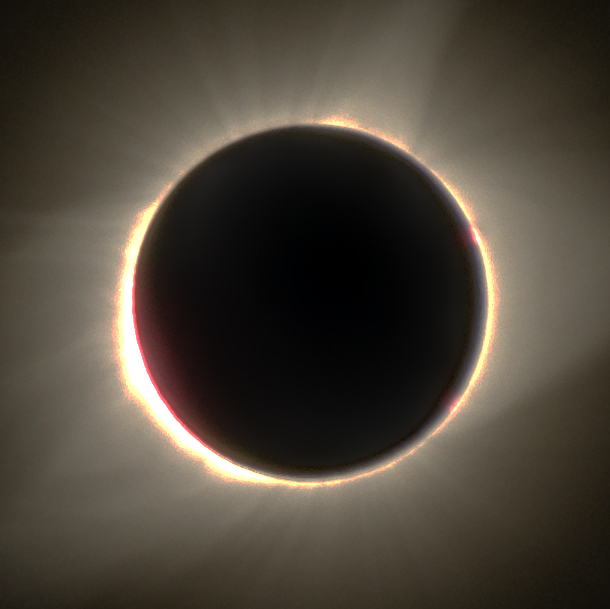
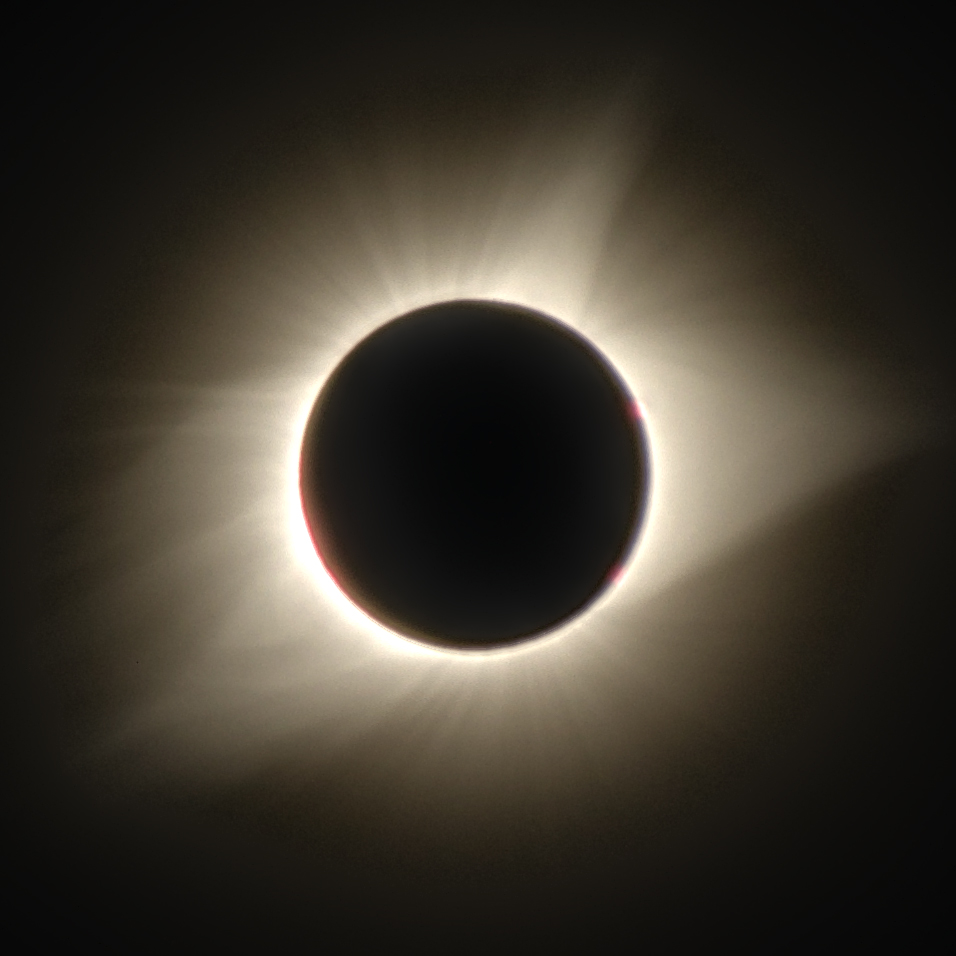
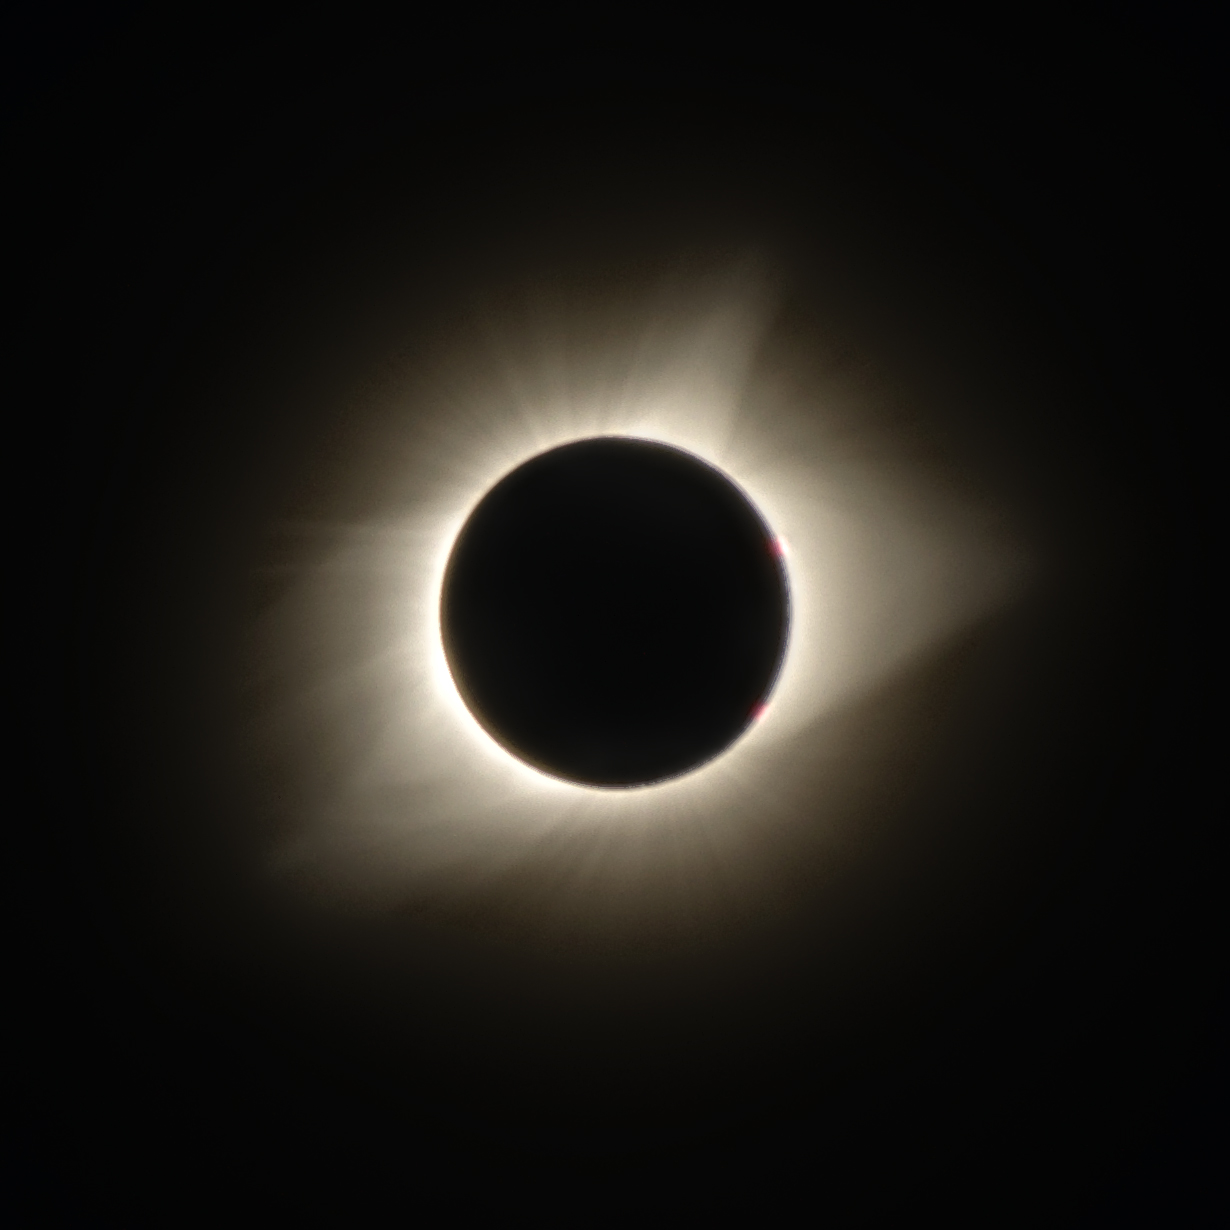
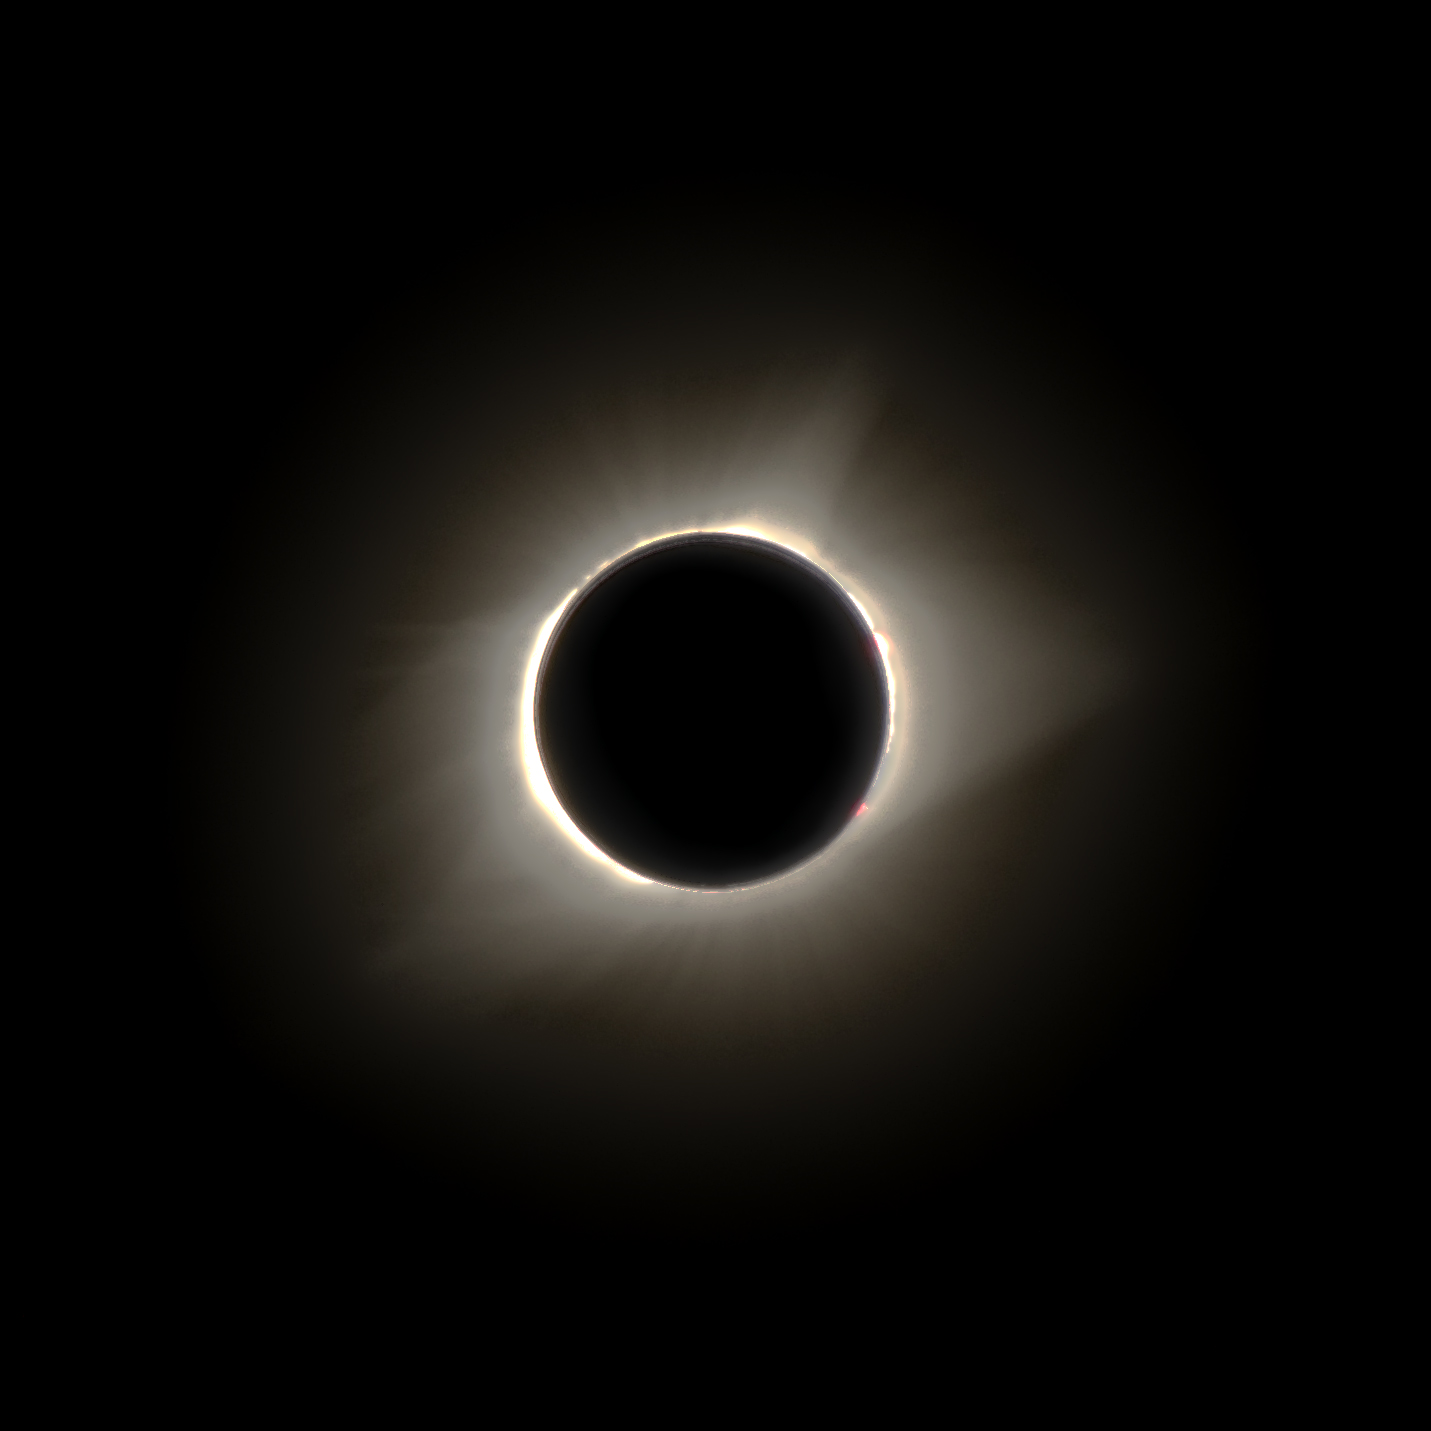
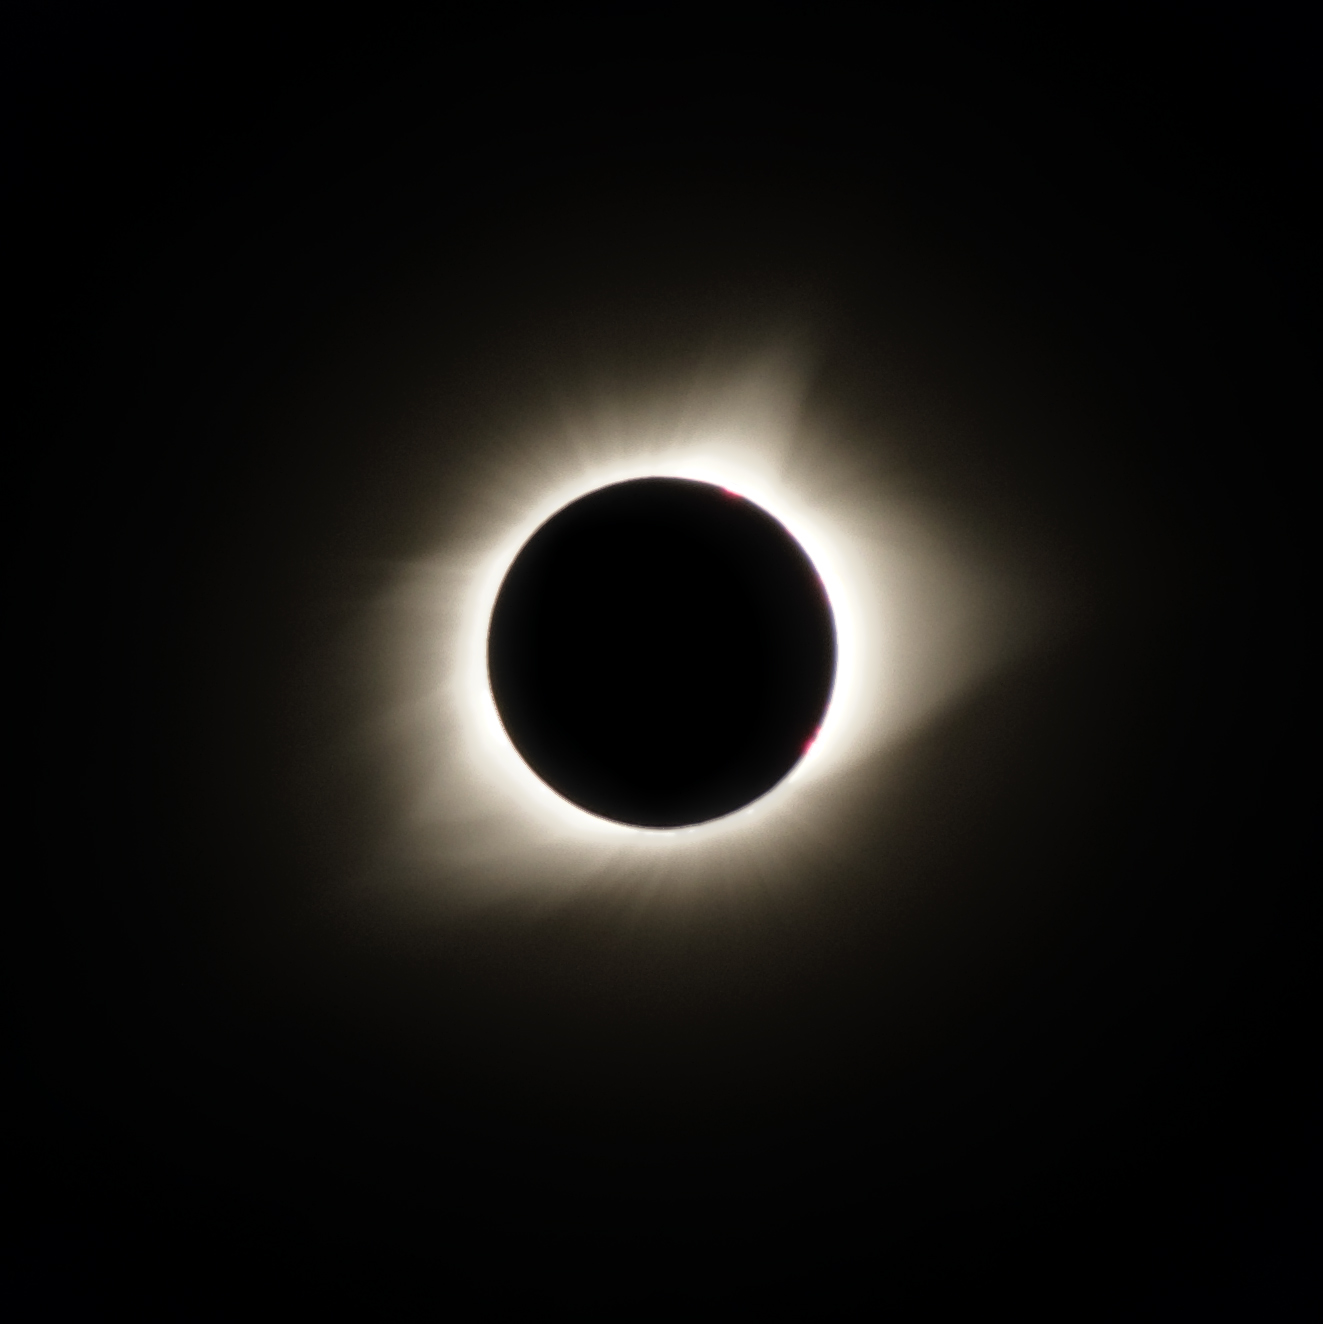
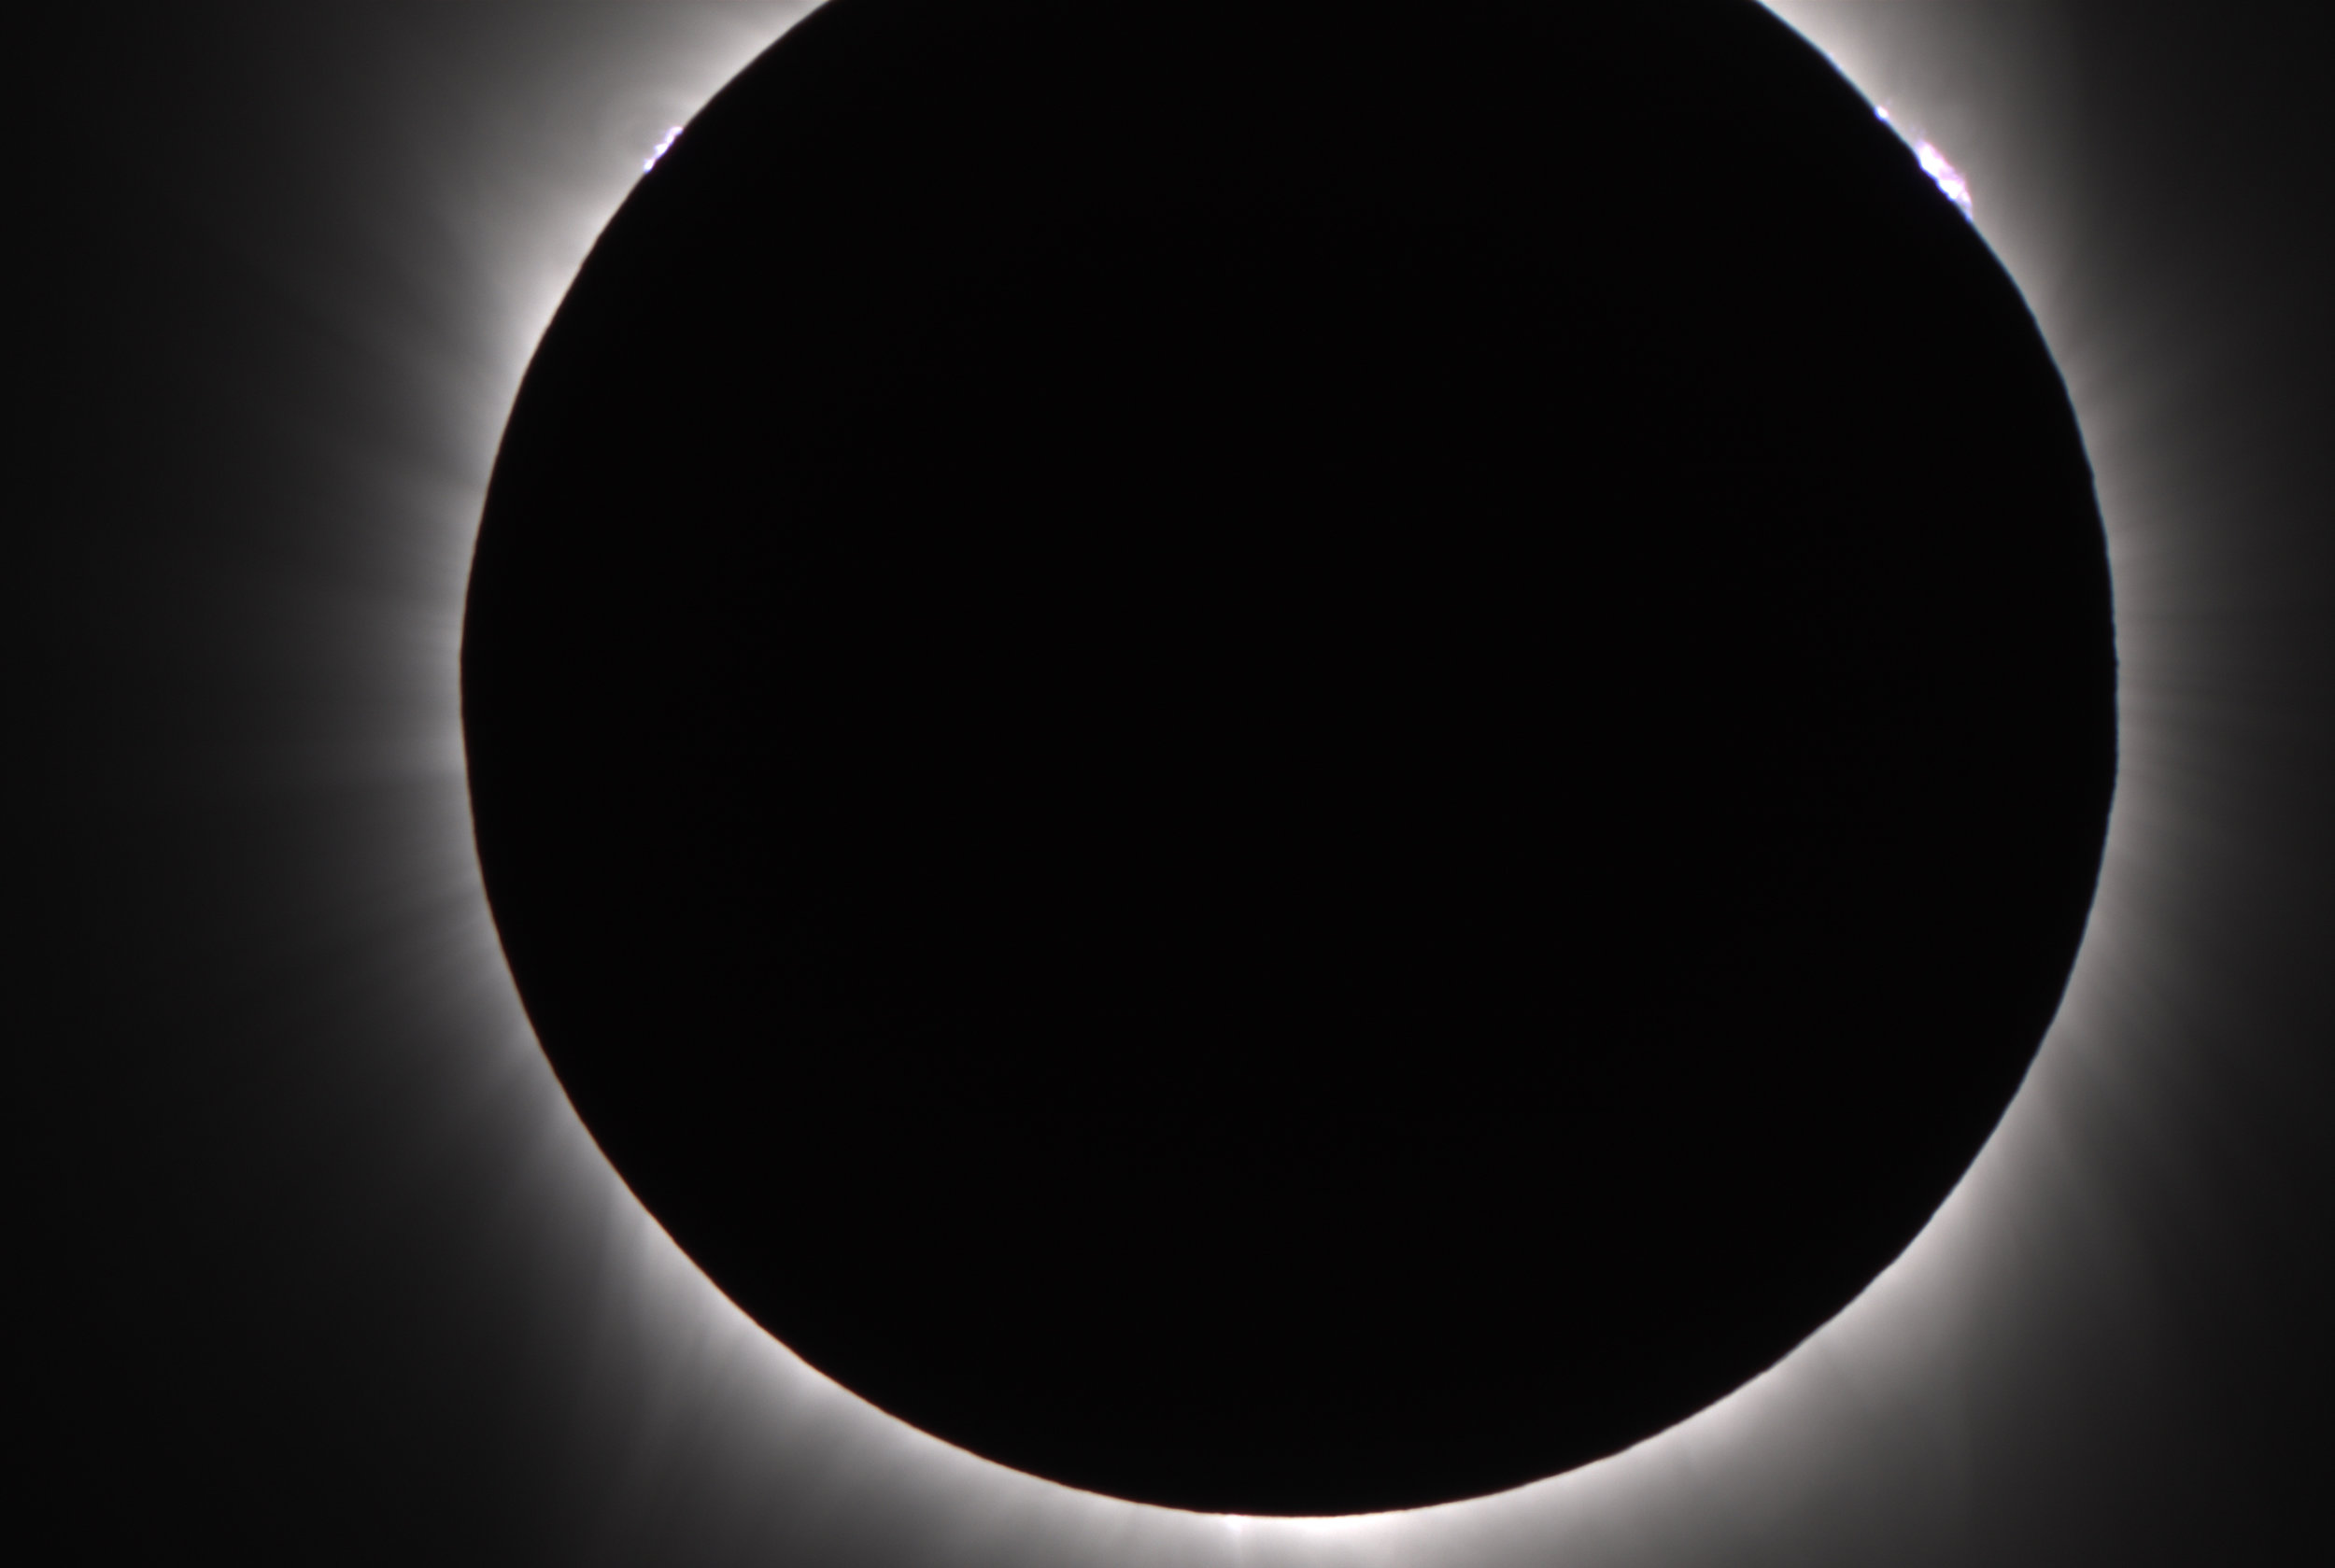
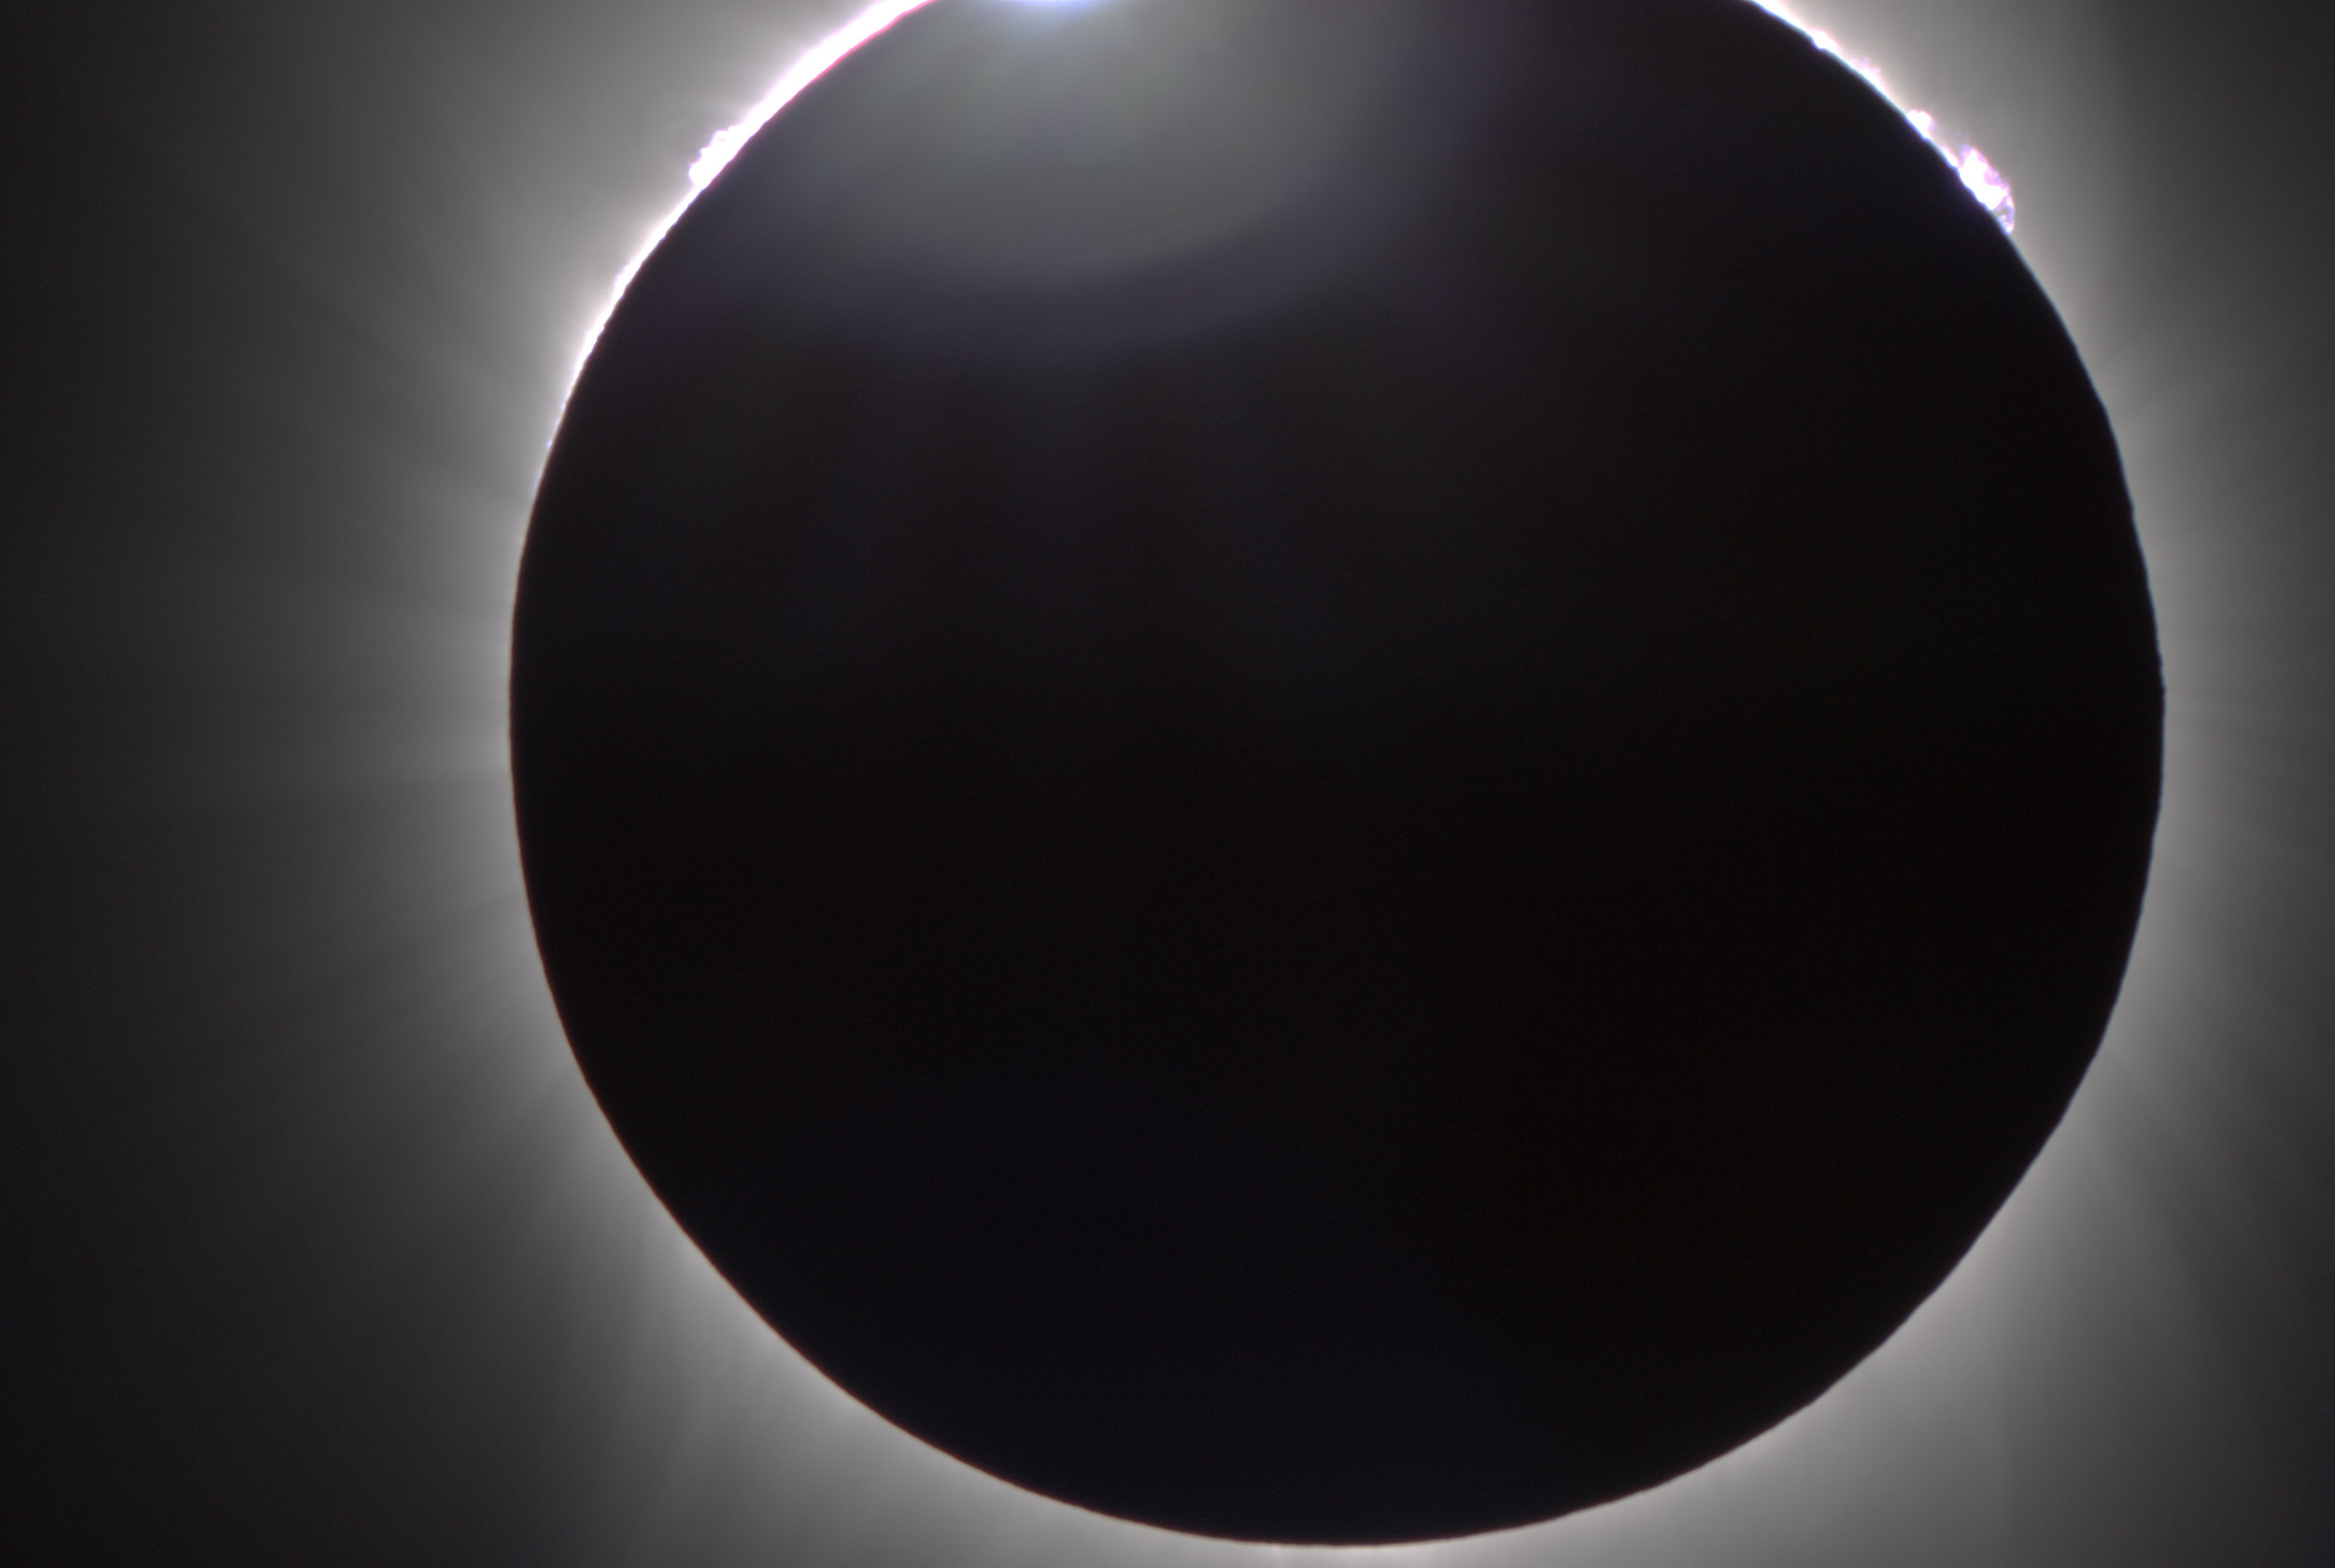
I processed these shots in a variety of ways to try and feature the detail in the corona streaming away from the Sun or to accentuate the prominences and fiery outcroppings from the Sun's surface.
It was really pity that I couldn't get the entire Sun in the camera that was hooked up to the telescope. I hadn't planned on using those shots during totality since I knew my exposure was set for a big sun disk with a solar filter on the front of the scope but after about 30 seconds of totality I thought "you've got nothing to lose" so I whipped the solar filter off the scope and ended up getting about thirty cool alternate shots. Thankfully I remembered to get the filter back on there quickly as the diamond ring appeared on the other side of the Sun this time, signaling the end of totality and no more looking at the sun naked eye for the rest of the day.
I've put together a video that combines the various videos and still images into something that is hopefully entertaining. Click this link to view it.
Epilogue
Well to say that the rest of the eclipse was anticlimactic would be an understatement, but totality is a hard act to follow and we were just seeing what we had seen the previous hour and fifteen minutes, just in reverse now. I kept monitoring the telescope camera, finished my sandwich, stopped the GoPro and occasionally fired off a salvo of pics on the still cam to capture the Moon's retreat.
This was the first day of my vacation for 2017 so after it was all over I drove to Atlanta to visit some friends and then headed up to Asheville NC for a couple of nights to see what my new 16" scope could do from a truly dark site at some altitude, and to see if I could get some deep sky astrophotography in.
The site at the Mt. Pisgah trailhead was recommended to me by the head of the Asheville Astronomical Society and didn't disappoint. There was a friendly local couple there who said they were regular "Sunset watchers" and I gave them a bit of a sky tour while putting the 16" through it's paces which didn't disappoint.
On the 2nd night which I was devoting to imaging, I went through the involved process of getting the scope truly polar aligned. I started with targets in the West since they were on their way down and thought the eagle nebula (M16) would be a good target. The mount was cooperating and went right to it and was easy enough to get centered for a nice shot. I used my brand new focusing mask to get exact focus and then stood around while the computer took twenty 2-minute exposures which I later stacked together in the computer and processed into the image below.
I was pretty confident that I was getting good shots and because of the time and effort involved in getting everything set up and working I decided to try M8, the Lagoon Nebula which is popular with my stargaze audience because it's an open star cluster, a reflection nebula and a dark nebula all in the same field of view.
For the shot below I took twenty 90-second exposures but had to throw out about five of them because the mount was not being auto-guided and some of the individual exposures looked more like teardrops than stars. Nevertheless I'm very happy with this image:
As I've mentioned elsewhere on this site I've been trying to take deep sky astrophotos one way or the other with only marginal success since I was six years old and now that I'm almost 60, it's really gratifying to see that if I give myself some time, I can figure things out! Eventually…
Bill the Sky Guy